Tutorial
CSS stands for cascading style sheets. They are used to define how HTML elements are displayed. To be most efficient these style elements should be placed in a separate file.
Then when each page of your web site is loaded it will modified by this file.
Changes to all pages in a web site can be made quickly.
Uniformity can be accomplished throughout the web site by using this method.
If you went through the Step By Step lesson on Web page design, you were introduced to CCS.
In that lesson you started out with creating a css style file to help you organize the way your site looks: Fonts and colors, the way lists are displayed and how headlines appear was covered.
In this lesson we will go beyond the simple style elements to develop very professional looking web sites.
If you use other software you can still use this tutorial by just changing the elements in the style sheets.
To get a close-up and detailed look at all elements of CSS and HTML I suggest that you use Notepad or Notepad++
Notepad programs are on all Windows machines.
To create the CSS file, List the part of the HTML tag that is affected, like body.
Next type the left curly brace
Then type the property, like background
Then type a colon
Follow this with specifications of this property, like yellow
Type a semicolon
End with a right curly brace.
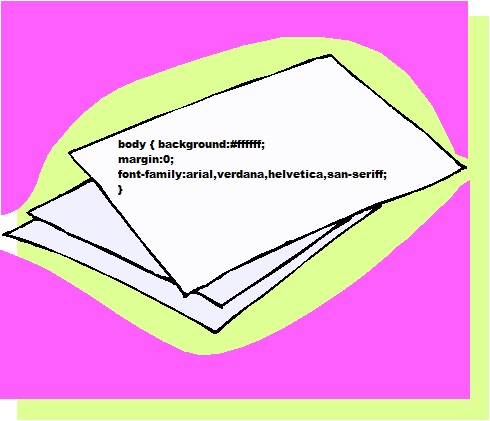
To change the color of the background of the body of the text type the following
- To set the color font size, font-family and how you want the text align, type P and the designations that follow.
- To set the color for a hyperlink type the information following the A
- The same goes for headlines one, two and three.
Save the file with a .css extension in the same folder as the HTML file.
In the lesson, you will also learn some HTML and how to code from scratch using a text editor program, Notepad and Notepad++
Materials to Collect
- Check out web sites for florist shops.
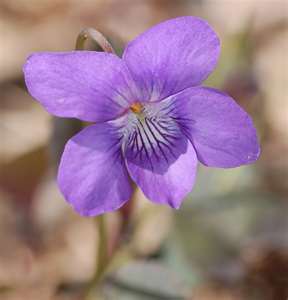
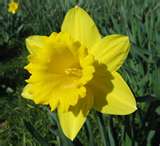
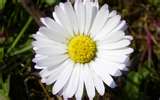
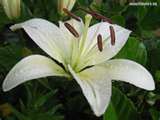
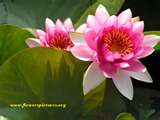
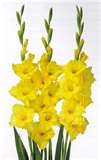
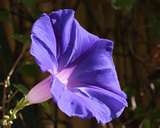
- Collect digital pictures of flowers:carnations, violets, daffodil, daisy, lily, roses, water lily, gladiolas, morning glory, marigold, chrysanthemum, narcisus.
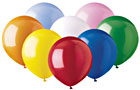
- Also collect arrangements of balloons.
- Collect pictures of gift baskets
- If you like, you may use the pictures in the tables below.
Picture for footer
- Drag the mouse pointer over the picture. The name of the file to save it under will appear. Use these file names when saving you pictures.
- Right-click the pictures and use "save picture as" command to put the pictures in your work folder.
| Pictures used on Facts.html page |
 |  |  |  |
 |  |  |  |
 |  |  |  |
Teacher's Responsibility
At beginning of each week of this lesson, handout Progress Logs to help in the evaluation of the project by your IT students.
Print out Cathy's Department Template From Janet's Web Site Helpful Forms-Forms, Templates and Letters
Printout VE Progress Logs from Janet's Web Site Helpful Forms-Forms, Templates and Letters
Fill out the Department Template for IT Department. -What do you want them to accomplish each week. These Department Templates appear on the right-hand side of your screen if you choose to use these plans.
Make a copy of the Department Template for the IT manager and give the Department Templates to the CEO.
CEO gives out Department Template to department head.
Department head gives out Progress Logs to each employee and from the Department Template and the workflow assigns each employee the tasks for the week.
Employee accomplishes the work assigned and fills in information on the Progress Log.
Completed Progress Logs for each employee are given to the department VP at end of week.
Department heads turn progress logs over to CEO.
CEO turns over progress logs to teacher.
Collect student work at the end of each week.
Record students test score at the completion of the unit. Tests are located under Step By Step Tests.
Here is what the home page should look like when completed.
Here is what the flower facts page should look like when completed.
|
Step-By-Step Instructions
Cascading Style Sheets Week 1
Printer Friendly Version Week 1
Day 1:
Understanding CSS and HTML Files
- Html stands for Hyper Text Markup Language
- Tags usually come in pairs 〈Body〉 and 〈/Body〉
- A beginning tag and an ending tag.
- Notice the the tags are identical with the exception of the "/" as part of the ending tag
- These tags tell the browser how to format the text and pictures headlines and lists of items
- The tags listed above are common to all web pages.
- Let's begin to work with this HTML code
- Put the HTML code on the clipboard.
- Highlight all the text, type CTRL C to put it on the clipboard
- Now open Notepad++ or Notepad. They are found in the accessories folder in Windows.
- Now click in the text area of Notepad, then type CTRL V to paste the code into Notepad.
- Now this code as it stands will do nothing until we add some information between the tags.
- The first and last tags 〈Html〉 and 〈/Html〉 tell the browser that this is web page document.
- The file extension".html" also tells the browser that this is a hyper text markup language document.
- When you save this document that we are working on, you must add the .html extension when saving it.
- Go ahead and save the file now. Call it Home.html
- The HEAD tags are used to define information about an HTML document, including its title, and search engine information.
- The 〈Title〉 and 〈/Title〉 are place holders for the title of your document. When search engines look for matches,the title is one of the lines considered.
- Also inside the head tags, just below the ending title tag, is a link to the style file
- This web page is for a flower shop called Winchester Canyon Florists. Type this information between the title tags and save your document.
- Inside the Head tags we need to type in the code to load the Cascading Style Sheet File.
- 〈LINK REL = STYLESHEET TYPE ="text/css" HREF="style.css"〉
- Now we are going to put inside the body tags the name of our company. This text, unlike the text in the title shows on the web page.
- We want it to really stand out in large letters so we will use the Headline tag. There are three of them. Text in Headline 1 is the biggest, Headline 2 is in the middle and Headline 3 is the smallest headline.
- Let's use headline 2. Later in the style sheet file, we will specify color and font-family, background color.
- Let's also center the name of our company using the Center Tags.
- Save your file. Call it Home.html
- Now let's look at part of the style file.
- Remember this is a separate file with a .css extension.
- The file is also keyed into Notepad or Notepad++
- You may also put this file information on the clipboard and paste it into Notepador Notepad++
- Inside the body tags, a series of fonts have been specified. If the first font is not available on the users machine, then the second font will be used, etc.
- There is also a default font if none of the three are available.
- We will examine fonts in more detail later in the lesson.
- Save the file under a name you will recognize, like style.css. Remember the .css extension
- The file name must match the file in the link to it in the HTML document.
- We will be adding to both files as we go through the lesson.
- When the HTML file sees the tag, 〈body〉 , for example, it knows to make the background color of the HTML page a dimgray.
- All colors are made from the primary colors of red, green and blue.
- To represent red in hexdecimal the number is FF 00 00
- Green is 00 80 00
- Blue is 00 00 FF
- Secondary colors are made by mixing equal amounts of primary colors.
- Tertiary colors are made by mixing primary colors with secondary colors.
- Complementry colors are opposite each other on a color wheel.
- Let's look at some color schemes for our web page for a florist Color schemes
- Here is how the colorspire web page works.
- Choose a base color. A color that helps convey the appropriate mood for our florist shop.
- With a color wheel it is easy to find colors that work with the base color.
- Click on a color that you think will work with the base color
- See the color scheme in the box to the right.
- Write down the numbers of the colors for use in the web site,
- Experiment with red, green and blue numbers to tweek the color.
- Play with the hue setting to refine the color even more.
- Here is another list containing colors. Use can use the hexdecimal or the name of the color if you wish. Color Chart
Day 2:
Changes to the Style File
- Now lets modify your style file by changing the body background colors in the current file.
- Open up your existing style.css file in Notepad or Notepad++
- Change the background color to F1EBE4. This is a much lighter gray for the background of the body.
- Change the color of heading 2, 〈H2〉 to CF6FBC.
- Save the style file.
- Now let's see how the style file has formatted the Home.html file.
- If you are using Notepad++ it is very easy.
- With the Home.html file in memory, click on the tab for the Home.Html file. Click RUN on the menu bar and select :Launch in (IE),Internet Explorer to see how the color and headline appear.
- If you are using Notepad, save your file
- Minimize the Notepad application with the style file.
- Double click on Home.html to see your work.
- Let's add some more headlines to the the.html file.
- Load the file/files into Notepad or Notepad++ if it is not already in memory.
- Notepad++ allows multiple files to be loaded at the same time. Each file is accessed by clicking the tab with its name on it.
- We want to create an 〈H3〉 for our web page.
- The text should say, "Our Flowers Color Your World"
- Remember to put the beginning and ending tags around the text and center the text using the Center Tags, 〈Center〉 and 〈/Center〉.
- Add the following lines to the style file.
- The P is for paragraph formatting. Each time the HTML file see the 〈P〉 tag it will display the text that follows the tag
in Arial font, 12 pixels in size the color will be navy, the font-style will be normal instead of Italic.
The weight will be normal instead if bold and the text will be left aligned.
- When the HTML file sees the 〈H1〉 tag you can see properties that follow in the style file will be displayed in the HTML file
- The 〈H2〉 and 〈H3〉 tag will produce the characteristics that follow in the style file.
- the 〈A〉 is the is used to display, in red, links to other pages.
- Save the style file and run or launch the florist file to see how it looks.
- if you did it properly, the headline three will be centered and have the color specified in the style file.
- Save Home.html file and test.
- The coding of your Home.html file should look like this at this point.
- Now add the header and footer information to your style file
- Your style file should look like the one below at this point.
- We are going to use the 〈DIV〉 and 〈/DIV〉 ,beginniing and ending tags for the header and footer in the HTML file.
- In the style file we identify the properties to be used: background color, margins, width, height and padding.
- In the Home.html file we use 〈div id="header"〉 tag to begin the header
We will deal with the colors of links, Headline 1 and footer and header colors at a later time.
Day 3:
How to layout the page
- We need to look at how the page is laid out.
- Our main function is to present information on how to purchase these items and to showcase our flower and balloon arrangements.
- We should have a header that tells the customer the name of our company phone number and products carried.
- We need the body tag section to showcase our monthly specials on our flowers, balloons and gift baskets.
- We need a footer at the bottom of the page. We will use a picture for the footer.
- We need to open up the Home.html page if it is not open already.
- Key in the following tag 〈Strong〉 〈div id ="header"〉 〈/Strong〉 just after the the line about Our flowers coloring the world and the center and paragraph tag.
- Draw out a sketch on how our page should look. Below is a drawing that represents this.
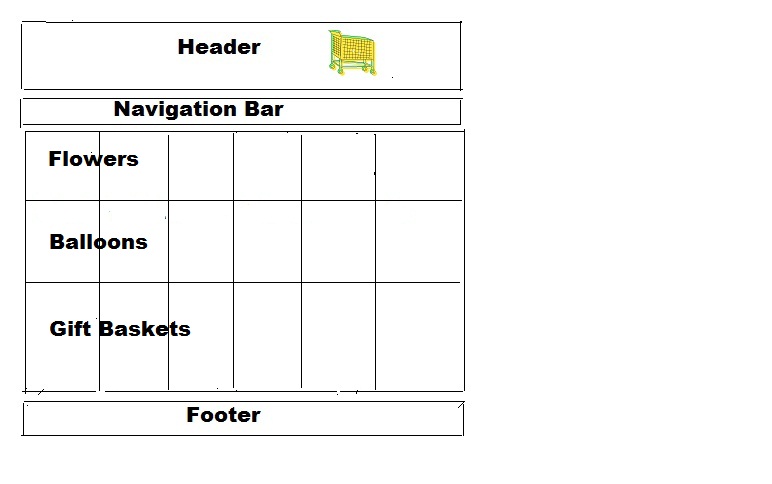
- You see the header on top. It tells the customer the name of the company, phone number and that they sell flowers, balloons and gifts.
- Check out the properties for the header. The border is a dotted line in red
- The navigation bar helps the user to navigate to other pages on our site.
- The body will contain monthly specials on flower arrangements, balloons, and gift baskets.
- The footer is an image of a balloon repeated several times.
- Make the style file look like the one below.
You will notice that we added two lines telling the HTML file how to format ordered and unordered lists. -->
- px stands for pixels
- The style elements for a border around the body and the color the border black.
- Make your file match the one just above this text.
- Your Home.html file should look like the one below.
- We have made a division called header. Here we can customize how the header looks. It does not have to have the same properties as the entire page.
- The style.css file contains the properties we wish to have displayed in the Home.html file.
The Home.html File
- To organize the way the text is displayed, we created a table inside the division tag.
- Tables are an excellent way to organize information on a web page. We start first with the 〈Table〉 tag.
- Next we layout how the table should look. We do want a border of 3 pixels for this table so we set the border equal to 3.
- We want some space between the sides of a cell and its contents. That property is called cellpadding. We set it equal to 5
- The next table property sets the amount of space in pixels between the frame of the table and the cells in the table, as well as the space between the cells themselves. This is called Cellspacing.
- Next we tell the browser that we want to create a table row, 〈TR〉
- Next we begin with the tag that tells the browser we want to make a table data cell, 〈TD〉
- Now type in the information we want to appear in the first cell: the phone number of the florist. Notice that inside the table cell is the formatting command to have the text appear as headline 2.
- Now turn off the headline 2 tag with the headline two ending tag and ending table data tag.
- Type〈TD〉 〈H2〉We offer same day delivery 〈/H2〉 〈/TD〉
- Type〈TD〉 〈H2〉Flowers- Balloons- Gifts 〈/H2〉 〈/TD〉
- Turn off centering with the 〈/Center〉 tag
- Now key in the ending 〈TR/〉 table row tag.
- Now key in the ending table tag, 〈/Table〉.
- Now we end the division tag with 〈/Div〉.
Day 4:
Navigation Bar and Main Part of the Body
- Here is where we put the navigation bar and the part of the page that showcases our products.
- We will use a 6 column table here and incorporate the navigation bar as part of it
- First create the table with the table tag〈Table Border=3 Cellpadding =3 cellspacing=3 〉
- Table row tag 〈TR〉 is next
- Look at the illustration below for the Home.html code.
- Add these lines to your Home web page just after the ending division tag.
- Save the file and test it to see that the navigation bar looks right.
- The links to these pages is in red.
- If you check the style.css page you can see that the links are supposed to be in Red. Change this color if you wish.
- When you click on the links you will not get to that page until that page is created, We only created the the begining of the Flower Facts page in this lesson.
- We now need to put pictures of the products in the table data cells.
- The first row contains flowers, the second balloons and third gift baskets.
- File names are flower1.jpg, flower2.jpg, etc
- File name for balloons are balloon1.jpg, balloon2.jpg, etc
- File names for gift baskets are gift1.jpg, gift.jpg, etc.
- Each cell in the table contains a separate picture.
- Make your Home.html file look like the one listed below.
- The Alt tag is what is seen after the user passes the cursor over the picture.
- We will make a link to flower1 with more information about that product.
- Notice that the tags for flower one are different from all of the others.
- We have made a link to a page called flowers1.Html. There we will have a information about this monthly special as well as its price and info about it.
- We could ,of course, and probably would make links to all items featured on this page, but that is not the objective of the lesson.
- Now it is time to put in a footer at the bottom of our page.
- We will use a picture of some balloons as our footer.
- In the footer section of the style file, make the section look like the 8 lines below.
- #footer{
- margin: 0 auto;
- width: 775px;
- height: 75px;
- background: url(balloons.jpg);
- background: repeat-x;
- padding: 0 20px;
- }
- In the Home.html file after the ending table tag,〈/Table〉, put in the following tags.
- 〈div id="footer"〉
- 〈/div〉
- Your files should look like the examples below.
The Home.html file
The style.css file
Day 5:
Fonts, Testing and Debugging the Files
- Fonts can vastly change the looks of a web page. Today we will experiment with different fonts.
- Fonts have a number of properties: font-family, font-size, font-style,font-weight and color.
- If you examine the style.css file carefully you can see that all of these properties are addressed.
- Sans-serif fonts have straight edges and do not have decorative elements. They are easier to read.
- Examples of Sans-serif fonts include Time New Roman, Georgia, Garamond and Bookman.
- Serif fonts have decorative elements like tails curlicues at the edges of the letters.
- Examples of these include Verdana, Arial, Tahoma and Trebucht MS.
- Mono space fonts have letters that are all the same size and width. Progammers use these.
- Font size can be measured in Pixels, px:. For example, 12px is larger than 8px.
- Font size can be calculated with the point measurement, pt:
- Font size can also be calculated as a percentage, 50% is equal to 8 pixels. 100% equals 16 pixels.
- Change the fonts in the style file to the following
- Leave the ordered and unordered properties the same.
- Change the body color to f0f8ff
- Change border size of the body to 4
- Change the color of the body border from black to 8a2be2
- Change the border style of the header to solid instead of dotted and make it 3 pixels instead of 1
- Change the Link color to blue instead of red.
- Save your file, make sure that you use the .css extension
- Show your instructor the changes.
Tag | Font-family | Font-size | Color | font-style | font-weight |
Body | Georgia | 8 px | 8a2be2 | Normal | Bold |
〈P〉 | Garamond | 18px | a52a2a | italic | Normal |
| 〈H1〉 | Comic Sans | 24 px | f592a0 | normal | Bold |
| 〈H2〉 | Times New Roman | 20 px | f592a0 | normal | Bold |
| 〈H3〉 | Arial | 15 px | f592a0 | Normal | Bold |
Cascading Style Sheets Week 2
Printer Friendly Version Week 2
Day 1:
Flower Facts.Html Page
- Layout the page - Day 1
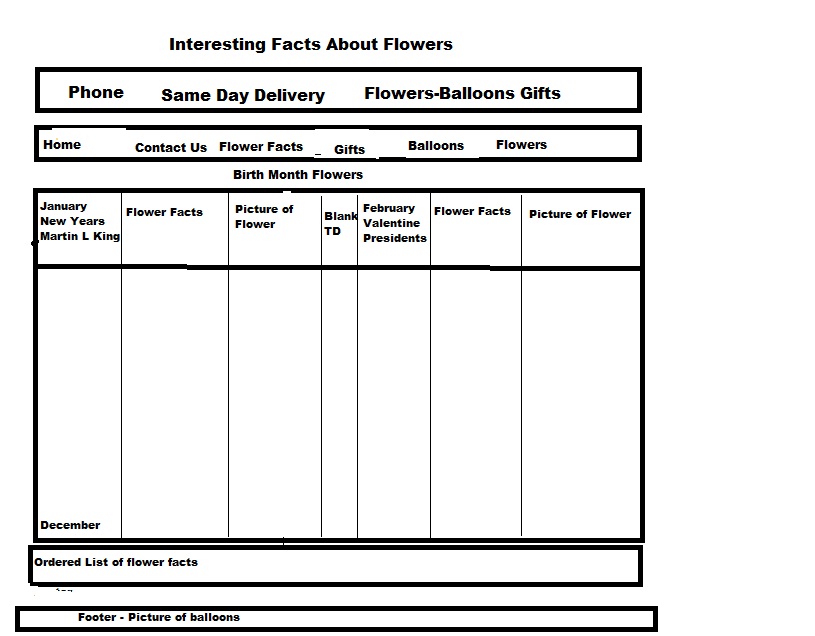
- See Drawing below for layout options
- We want to make a page that has facts about flowers
- We want to put the title on the page
- You can use the example below for layout purposes or design your own.
- We want the layout to include the header.
- The navigation bar.
- A table header called Birth Month flowers.
- A table with all twelve months of the year
- We will put two months per row separated by a blank table data cell, ie January and February; March and April, etc
- Each row will contain the month and holidays in that month, facts about the month's flower and a picture of the birth month flower.
- After the birth month flower table, we have a ordered list of flower facts
- The end of the page, like the previous Home page, includes the footer composed of a series of balloon pictures.
- Our style file will not change at this point, so we are going to concentrate on the HTML file.
- On the first day of this week create the Html file for flower facts. Call the file Facts.html
- Your Html file should look similar to the one below.
- The goal on day two is to Link the html file to the style file.
- Make certain to match the css file name with the one on your Html page.
Day 2:
- Today we will put in the header and navigation bar.
- The example below gives an example what this might look like in the Html file
- Make certain that the links to the other page works. Remember we called the file Home.html.
- We have not created any of the other pages, so those links are not expected to work yet.
Day 3:
- Today we will create a table with birthmonth flowers: name of Month, flower, flower facts and a picture.
- We will work on January through June.
- There is a table header at the top of our table 〈TH〉 that spans 8 columns and the text is justified.
- Each table data cell is a different color: One for the month, one for the facts and one for the picture of the flower.
- The color arrangement was chosen to make each month more distinguishable.
- There is also a blank table data cell between each month to make it more readable.
- Change the colors if you wish, however, remember the color scheme for the web pages.
- See below for this part of the assignment. You may research the flower facts and change that information if you wish, The holidays are in an unordered list. See the style file as to how these lists will be formatted.
- You will notice that each month has Html tags around it, 〈!-Month--〉
- These tags are ignored by the browser. They are notes to the programmer as to what is to follow.
- These remark tags are helpful in many situations
- You can block off certain sections temporarily to see how your code executes.
Day 4:
- Today we will complete the birth month table - July to December.
Day 5:
Printer Friendly Version Week 3
- On day five of week two we will finish the facts page completing a table of interesting flower facts and the footer.
- We will also conclude the page with the ending HTML tags for the body and end of document.
- Look below for the last part of this flower facts web page.
|