Load the template.html file into Notepad++. You will be putting the time card information into the column on the left called <nav>. Make sure that all your work on the time card falls in between the opening <nav> and ending </nav> tags.
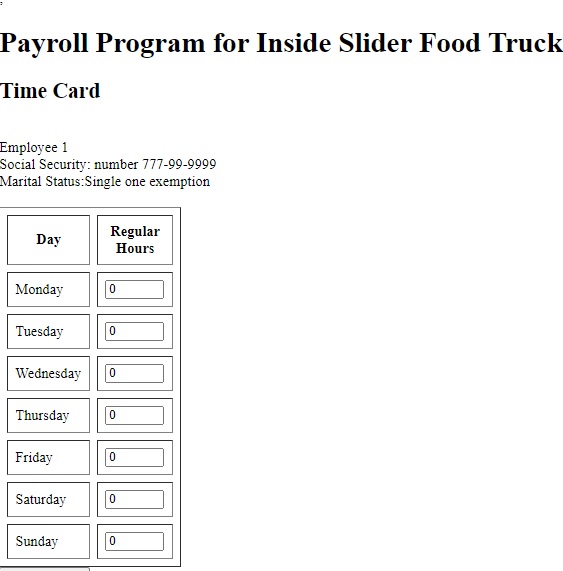
Use headline 2 tags to emphasize the words <h2>Time Card</h2>
Type in "Employee 1" on the next line followed by a line break <br>
Type the social security information: Social Security Security number: 777-99-999 followed by <br>
Type "Marital Status: Single one exemption" followed by a line break <br>
Now we are going to make a table to hold the time card code. Key the following code to begin the table:
<table cellpadding=8 cellspacing=8 border=2>
Now we are going to make the heading for the table. Key in the code below.
<tr><th>Day</th><th>Regular<br>Hours</th></tr>
Now we will create the body of the table. Key in the lines below.
You now need to finish the table. There is a line for each day of the week. Each row starts with a <tr> and ends with </tr>. Notice how the variables are assigned. Be careful. Case matters
The input you are calling for is a number for the hours worked each day. HTML 5 gives you a neat way of entering numbers, by just clicking on the up or down arrow. The number shows in the box. Minumum amounts and maximum amounts are set to zero and 12.
Everday is given its own id and name. The value of the variable is set to zero in case no number is entered.
Use "wednesday" as the id and "regHoursWed as the name
Use "thursday" as the id and "regHoursThurs" as the name.
Use "friday" as the id and "regHoursFri" as the name.
Use "saturday" as the id and "regHoursSat" as the name.
Use "sunday" as the id and "regHoursSun" as the name.
Include min and max code for each day as well as the number input code.
To end the table, key in the following code.
</table>
Save your program and test it. Click on the arrows for each day to make sure that each is working. You should see something like this.
Compare your work with Time Card Table
Day 3: Calculate button and javascript code
Now we need to take the numbers entered into the time card and do a lot of calculations that will result in information to prepare a payroll check for our employee.
Key in this code just below your table. Here is what it all means.
D div tag
Div Tag | HTML
Div tag is Block level tag
It is a generic container tag
It is used to the group of various tags of HTML so that sections can be created and style can be applied to them.
If you look in the cascading style sheet files you will see how the button is styled. It has a yellow background.
When you hover over it it turns light grey.
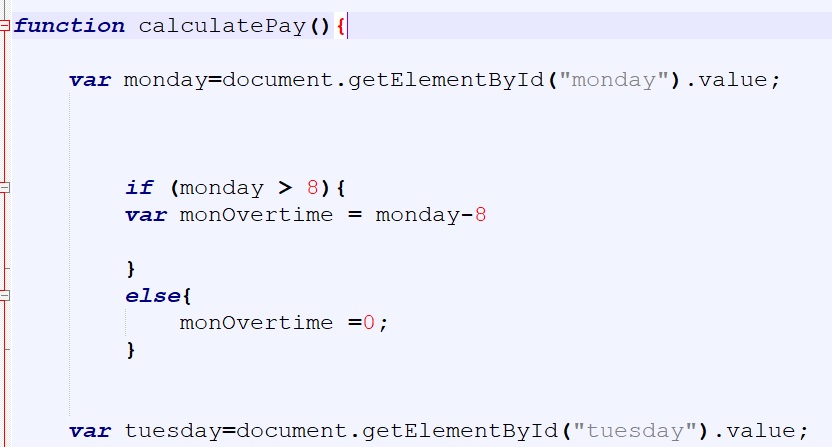
Next we declare the button. When it is clicked it runs the javascript code function called calculatePay() located between the script tags.
function calculatePay(){
var monday=document.getElementById("monday").value;
if (monday > 8){
var monOvertime = monday-8
}
else{
monOvertime =0;
}
First the function is named. The first, left-pointing curly brace "{" starts the function. The right-pointing curly brace at the very end of the code ends the function "}".
Next the variable "monday" is declared and sets it equal to the value of the monday hours in the HTML section. It uses the id.
Next we check to see if monday hours are greater than 8. We pay overtime for any hours worked over 8 hours each day. This code is also enclosed by both a beginning curly brace and ending brace.
Now we declare a variable called monOvertime. Overtime for monday is any hours over 8.
If there is no overtime for monday we declare monOvertime=0
Make sure that the curly braces are in pairs. In Notepad++ click on the first curly brace. The one opposite the function name. The brace will turn red. The ending curly brace for the functon will also turn red.
Notice the red line on the left of your screen. It goes from the first curly brace to the last one in the function. If it does not go all the way to the end, you have made a mistake in placing the curly braces.
Try clicking on other curly braces.
Now you need to finish the function for the rest of the days of the week. The format is identical for each day.
Code for calulate pay function
After completing the code for this function. Save your file and test it out using the browser of your choice.
Errors occur all the time when coding. Javascript has a debugger that allows you to isolate the error. Chrome, Firefox and Edge have this tool. After running the code, just press the F12 key and then select console to see your error. The error and line number will appear.
An excellent web site that I use all the time is w3schools. They have lots of practical examples and it is clearly written. I highly recommend it.
W3schools.com
Now it is time to get some totals from our time cards. We need to add up the total hours worked. That is what the first line does. The parseInt makes it a whole number and allows us to add up the hours worked each day.
The next line adds the overtinme hours. The third line gets the total regular hours worked.
Add these lines to your program. Save your program and run, enter some numbers in the time card and then execute it by pressing the calculate pay button.
When writing a program like this, manually check to see if the calculations are correct. Correct if necessary, then continue coding the rest of the application.
Now its time to code for the hourly and overtime rates. Add these two lines to your code.
var payRate = 15
var oTPayRate = 15*1.5
Now we are going to put a heading on the employee infomation section.
var company ="<center>" + "<h3>Inside Sliders" + "<br>" + "Payroll Register</h3>" + "</center>";
document.getElementById("demo2").innerHTML = "Employee Name : " + employee;
The first line creates the company name centered and in h3 markup. The second line takes that information and displays it at "demo", which is on the HTML page section.
Where to put code demo and results
You will want to enter this code in the article section of your page. That is the midddle section of your page. Even though you only have some of the information for all the results, save and run the program. If there are no results, nothing will print.
Now we need to get back to the javascript coding. We need to calculate: total regular hours, total hours, total overtime hours, total regular pay, overtime pay and total pay.
These lines will do that. Add them at the end of your existing javascript code. Save and execute. Correct any errors as you go.